Hello, dear smart home enthusiasts! Today, I want to share my journey from Homebridge to Home Assistant and how I connected Home Assistant with Hue. I used Homebridge for a long time, and it met many of my needs. However, over time, I realized that its functionality was too limited for my growing smart home requirements. I required a solution that could offer more. Then I discovered Home Assistant. Connecting Home Assistant with Philips Hue took my smart home experience to a new level. It was a simple process that opened up a wealth of features and possibilities that I didn’t have before. So, if you’re also thinking about expanding your smart home experience, join me on this journey. I’ll guide you through the process. Let’s get started!
What Do I Need to Connect with Hue?
To connect an existing Home Assistant installation with Philips Hue, you need the following items:
- Philips Hue Bridge: This is the gateway that connects your Hue devices to your network.
- Philips Hue Devices: These include lamps, switches, and other devices you want to integrate into your smart home system.
- Home Assistant: A running installation of Home Assistant on a device like a Raspberry Pi 4.
How to get a Home Assistant installation is described in this article:
Getting Started with Connecting Hue to Home Assistant
- Connect the Hue Bridge to your home network.
- Install the Hue app on your smartphone and connect the app to the bridge.
- Set up at least one light in the Hue app.
If Hue was already installed on the network before installing Home Assistant, the Home Assistant integration for Hue should already be visible under >Settings>Devices & Services>Integrations.

If the Hue integration is already displayed, you can scroll down to the heading “Connecting Hue to Home Assistant.”
Adding Hue Integration to Home Assistant
If not, add the integration via this link: Add Hue Integration.
After clicking the link, check the IP address, it should match the IP address of your Home Assistant installation. If the IP does not match, it must be changed. To change it, click the edit pencil to the right of the IP address and make the change.
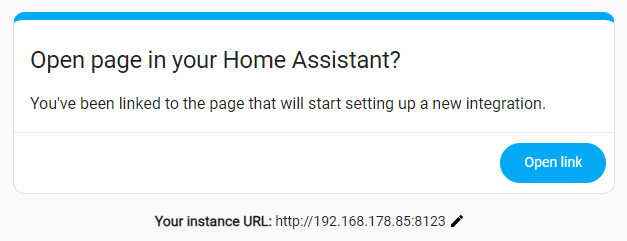
If everything is correct, click the “Open link” button, and the Home Assistant login page will open. After logging in, this pop-up should appear immediately:

Of course, click “OK,” and then this dialog will appear:

Since my Hue was already on the network before installing Home Assistant, it may be that no Hue is displayed for you, and you need to click “Set up another instance of Hue.” In the following dialog, the IP address of your Hue will be displayed.
Connecting Hue to Home Assistant
After confirming with “Submit” or after clicking on the Hue if it is already displayed or if the Hue was already displayed under integrations, and you clicked configure, the following dialog will appear:

Now you need to press the button on the Hue so that Home Assistant can register with the Hue. Now click “Submit,” and the setup of the Hue is complete. The devices registered with the Hue will be displayed:
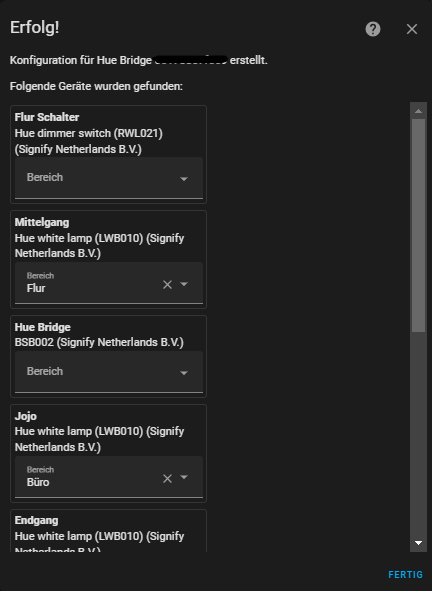
After clicking “Done,” that’s it; the process is complete. The tile of the Hue integration now shows the number of devices:

In conclusion, I want to say that switching from Homebridge to Home Assistant and connecting with Hue was one of the best decisions I made for my smart home. It not only met my expectations, but far exceeded them. I hope my experiences and guides help you improve your own smart home experience. Remember, the possibilities are almost endless, and it’s never too late to take the first step. Good luck on your smart home journey!