There are many tutorials on how to install Homebridge “manually”. Or how to manually maintain the system step by step. With almost every update of plugins. In the beginning, I was wondering if the world needed another tutorial on how to set up Homebridge on a Raspberry Pi. But I spent a lot of time setting it up and even more hours maintaining Homebridge, and it was often just trivial things and typos that made me despair. In the end, I decided to develop this post. In the article, I show my current approach that allows newbies with simple steps to get a working and easy to maintain Homebridge at the start.
What does the Homebridge do?
Homebridge brings devices into Apple HomeKit that are not actually supported by it.
The Homebridge on Raspberry Pi recipe
To make it work with Homebridge on the Raspberry Pi, certain ingredients must be present:
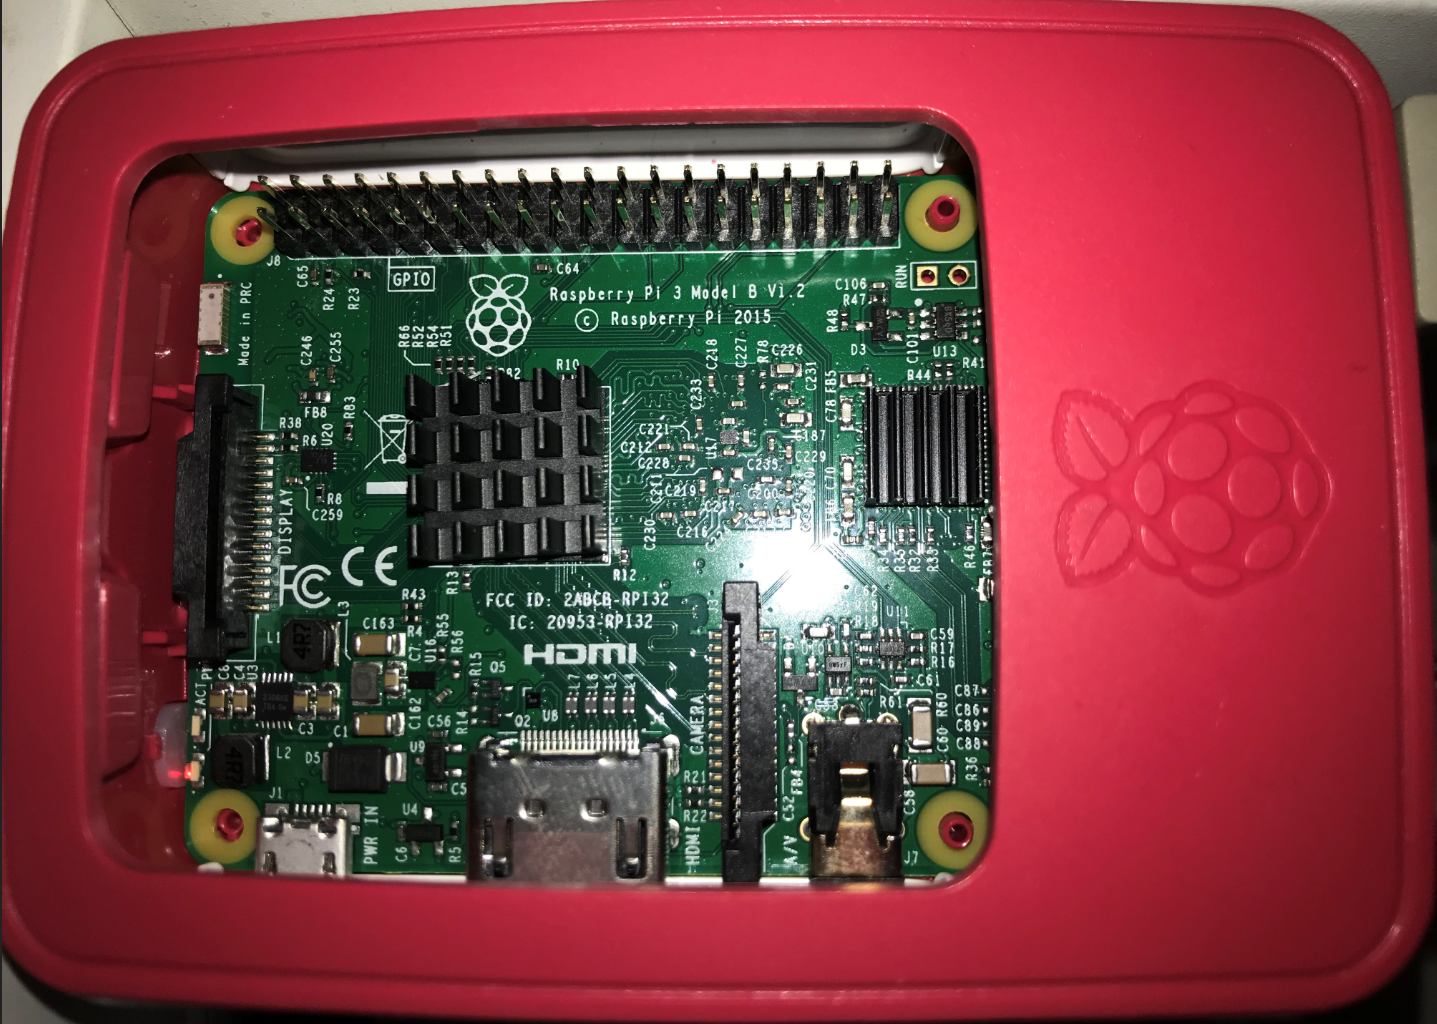
- Raspberry Pi 3* or Raspberry Pi 4*
- optionally a case for the Pi
- optionally, I have also attached heat sinks*
- one Micro SD memory card
- I use 16 GB SanDisk* with SD card adapter
- Of course, still a card reader for the PC
- With a power supply with approx. 3A, so you are on the safe side
- Latest release of the official Homebridge image
- The Etcher software to transfer the image to the memory card
- the software Putty for the SSH connection to the Raspberry, in our case necessary for maintenance
Once all this is in place, you’re ready to go!
The download and transfer of the image takes some time and should be done first. When transferring the image, just use the time to mount the heatsinks and install the Raspi into its case.
Flash Homebridge with Etcher
To transfer the image, I use the tool Etcher. In the beginning, I used Win32Diskimager to transfer the image. But with Etcher there are fewer possibilities of errors. SD card drives are preselected by Etcher. Moreover, Etcher is also portable and runs without installation.
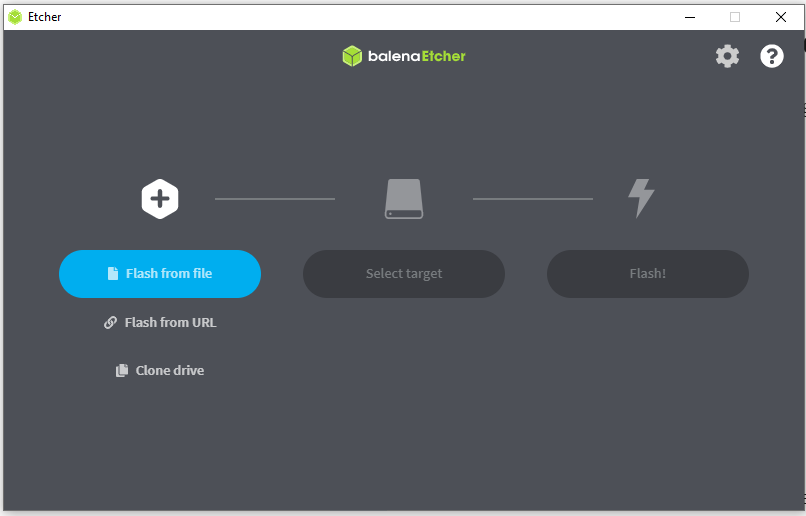
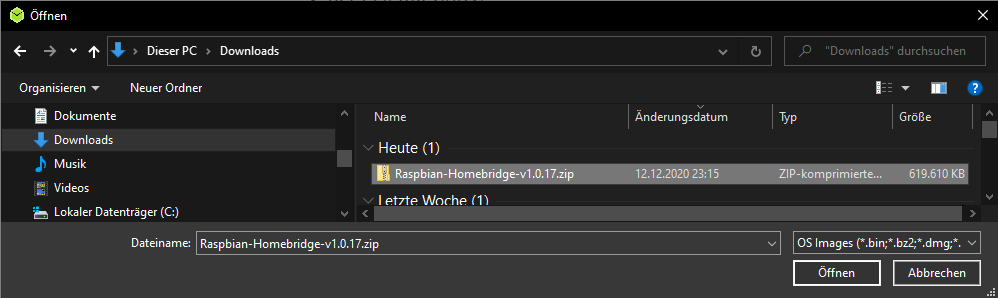
After pressing the “Flash from File” button, select the downloaded image .zip file.
Then select the SD card drive by clicking on “Select Target”. If the SD card is already inserted in the reader, it will be recognized directly. If the card is already written with a Raspberry OS, Windows will recognize several drives. Windows may claim that the SD card is damaged and suggest you repair it. You do not do that! The card will be completely overwritten anyway. If you later put the flashed SD card into a Windows computer, you must never repair it with Windows. Otherwise, it will not work on the Raspberry Pi any more, and you will have to re-flash or your Homebridge settings will be lost.

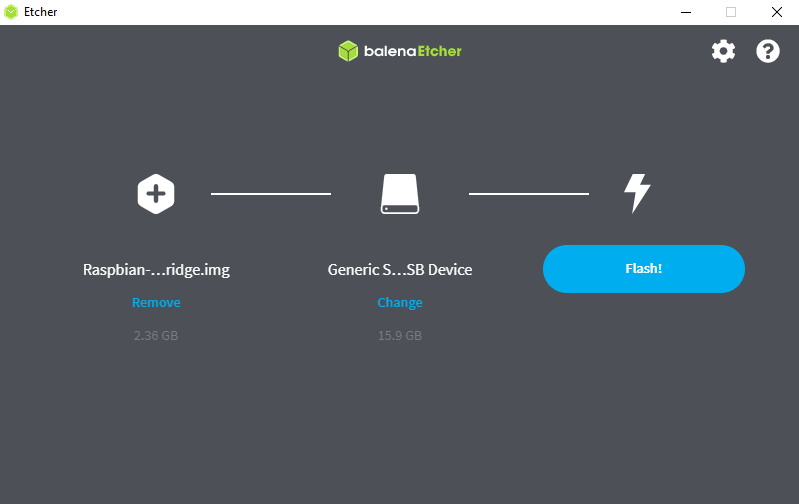
After pressing the Flash button, the SD card is written, Windows may ask you if Etcher is allowed to make changes, you should confirm this with “Yes”, otherwise nothing will run.

After successfully transferring the Homebridge image, the Micro SD card will be inserted into the Raspberry Pi.
WLAN or LAN Cable
This question should be asked and answered before the first startup of the Raspberry Pi. If you decide to use W-LAN, then there should be no LAN cable plugged in for the first startup. I clearly decided to use the LAN cable and plugged it in before connecting to the power supply. This is because an Ethernet connection is recommended as it provides the easiest and most stable Homebridge setup.
WiFi Setup
Follow the steps below to connect your device to the Wi-Fi anyway:
- Turns on the Raspberry without LAN cable connected.
- Waits 1–2 minutes
- Use your smartphone to search for new Wi-Fi networks
- Establishes a connection with the “Homebridge Wi-Fi Setup” hotspot
- Wait a moment until the portal opens. Via the displayed portal, you can connect the Raspberry Pi to your local Wi-Fi network.
If you entered the Wi-Fi credentials incorrectly, the Homebridge Wi-Fi setup hotspot will reappear, so you can try again.

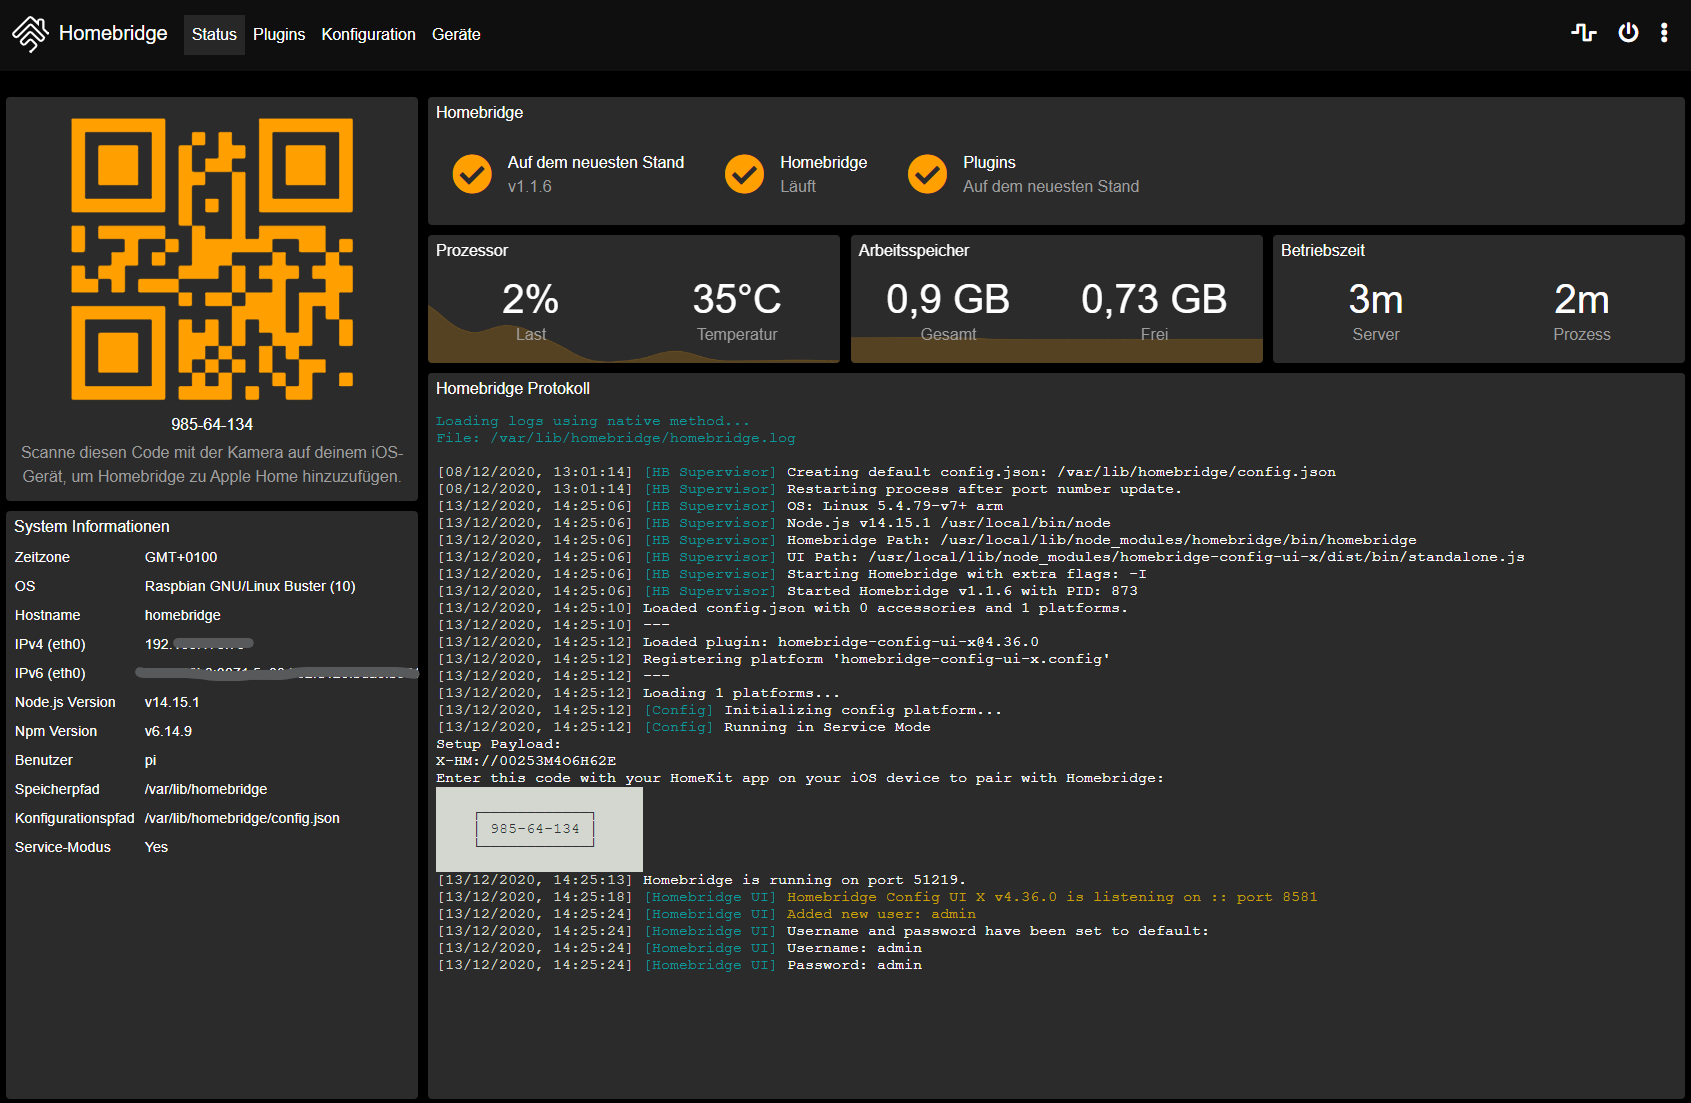
Manage Homebridge
If you want to access the Homebridge user interface with a macOS or mobile device, this should work via
HTTP: //homebridge.local should work.
The default user is admin with the password admin
After the first login, the password should be changed! This can be done in the menu at the top right if you click on the three dots under user accounts.
If you are using Windows like me or HTTP: //homebridge.local does not work for you, you must find out the IP address of the Raspberry Pi in another way:
- Log in to your router and look for the IP address assigned to the Raspberry Pi on the “Connected Devices” or “DHCP Clients” page. I look at my Fritz.Box under “Home Network > Network” there are all active devices listed with their IP addresses.
- Use an iPhone to access http: //homebridge.local. Once you have logged in with the default username and password (admin / admin), you will find the IP address under the system information in the bottom left corner.
- If you connect a monitor to your Raspberry Pi, the IP address will be displayed on the screen after booting.
If you know the IP address, simply enter it into the address bar of the Internet browser. The login screen of the Homebridge appears. After logging in, you are already on the user interface.
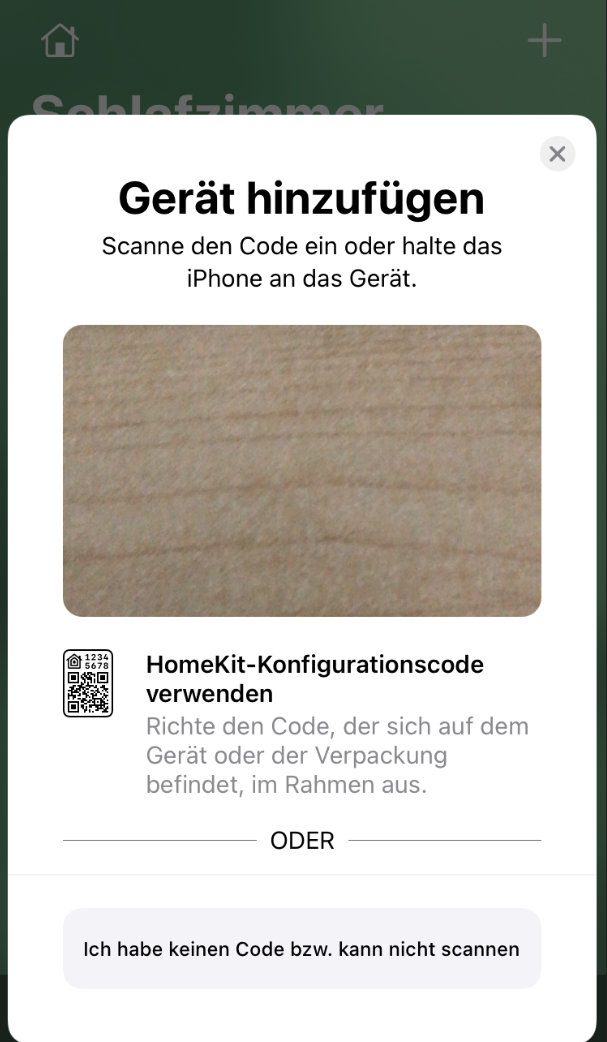
Add Homebridge to HomeKit
Once you are ready, you can add the Homebridge to HomeKit. Either with the QR code or you enter the numbers directly in Home at “Add device”. You can enter the numbers directly by tapping on “I don’t have a code or can’t scan”.
Homebridge maintenance
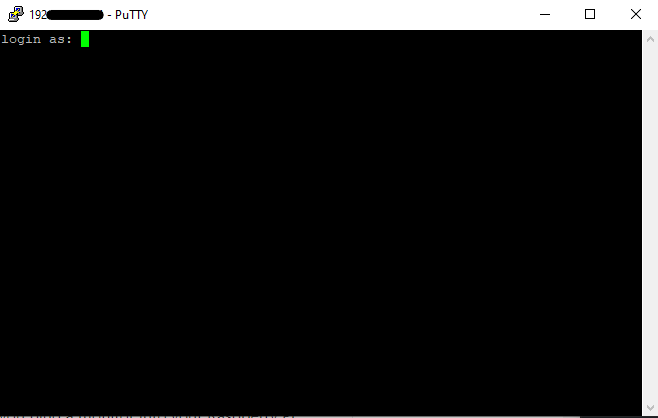
Now comes the real advantage of using this image. There is a maintenance tool. Because there are regular updates of plugins and the Homebridge UI. These updates usually need an update of Node.js now and then. In the past I have always done this on foot or better manually, at some point it is just annoying. That’s why I find this tool ingenious! A real help and time saver! However, you require an SSH connection to the Homebridge Raspberry. For this I use the software “Putty”. After installing and starting Putty, you will see the following:
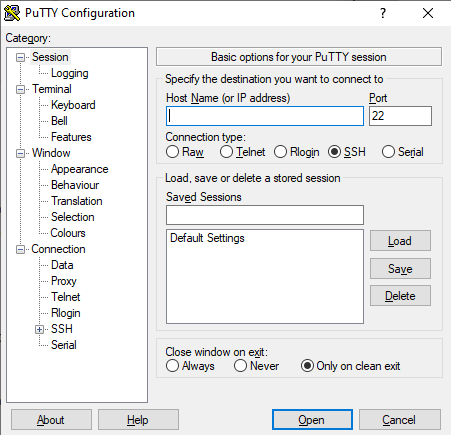
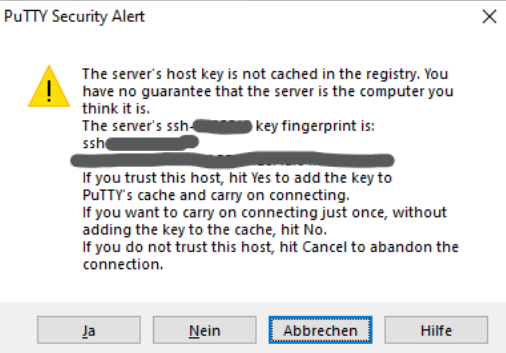
Enter the IP address of your Raspberry under “Host Name (or IP Address)” and press Open. You might get a hint that this is a connection with an unknown device, here you must confirm with “Yes”, otherwise nothing works. In the future, this message will no longer appear.
If everything goes right, the login will come:
The default user is pi, and the password is Raspberry.
The username is visible when typing the password is not, no cursor moves, this is normal. Once you have done this, the screen looks like this:
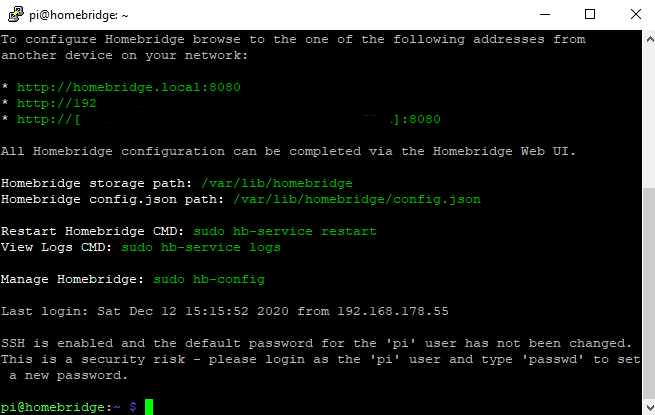
Here you can read some further information. Among other things, how to open the config or maintenance tool. Namely, with sudo hb-config
after confirming the entered command, the screen looks like this:
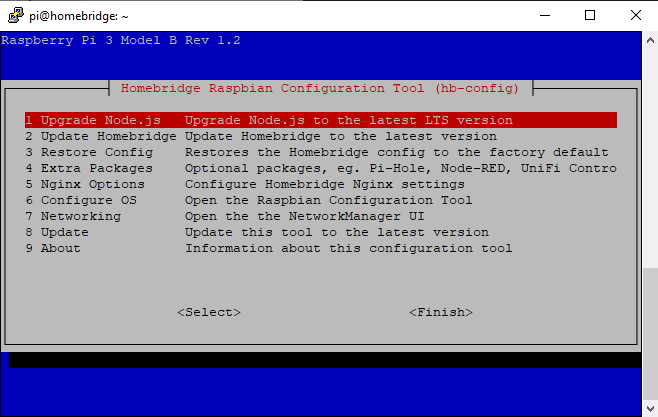
Then you have done it! Here you can update the Homebridge, Node.js and the maintenance tool itself and install additional software like Node-Red or deconz / Phoscon. This is your maintenance center next to the plugin page of the Homebridge web interface. Important is that not so many SSH commands must be typed in the correct order, for me a mega advantage. Even if later Node-red or a ConBee* should be used for an own Zigbee network, you can simply install the software here. With manual installation, there are always pitfalls where, for example, Node-red and Homebridge get in each other’s way and refuse to serve. But these are future blog articles. 🙂
Homebridge backup of settings
In the Homebridge there is a function that allows you to save the settings of the entire Homebridge. This means that if a situation arises where a new Homebridge needs to be set up, all you need to do is import the backup into the new Homebridge, reinstall the plugins and the Homebridge is up and running again! This function can be found in the top right corner of the menu, which is hidden behind the three dots.
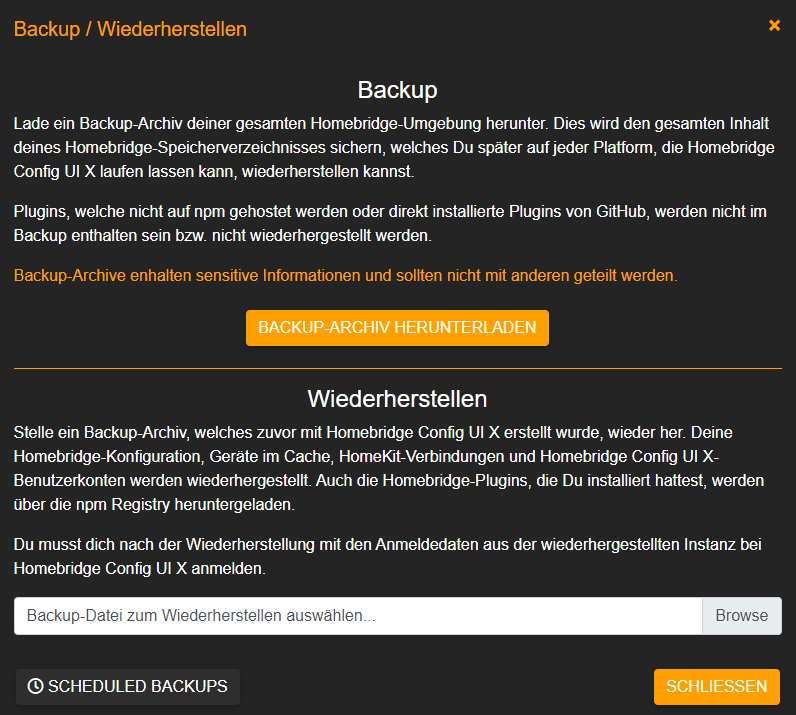
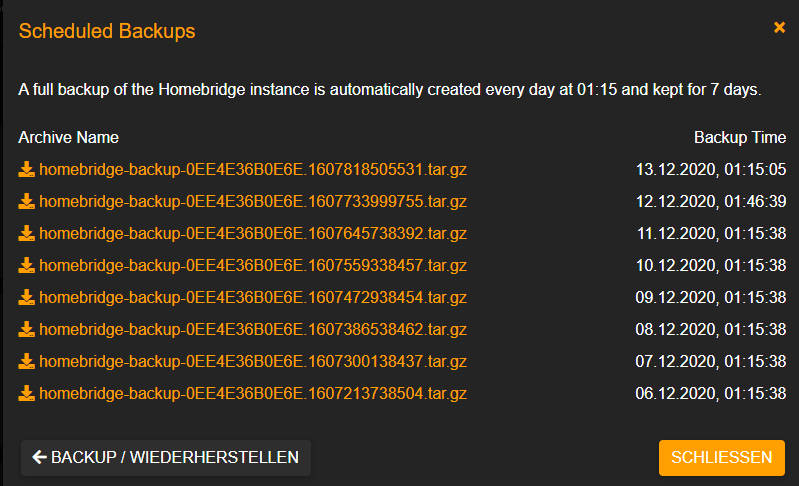
The wonderful thing is the “Scheduled Backups” here a backup is automatically created every day and kept for 7 days. You don’t need to set anything, it runs automatically. However, from time to time or when a change is planned to the system, you should download a backup and save it on the PC or somewhere else. Because, once the memory card breaks, the backups are gone too.
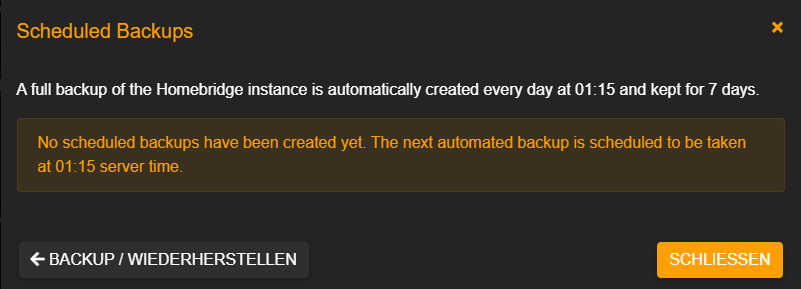
After a while it looks like this:
Closing words
So, before I found the official Homebridge image, it was always a pain to update Node.js. I still wonder why I didn’t go to the main site, https://homebridge.io/ and use the given image. Probably because I had already installed a Raspberry OS with a desktop for other attempts and was glad that it runs. Moreover, you don’t always have enough Micro SD cards at hand for further experiments. The idea to try and use Homebridge came to me later when a Philips Hue* came into the house. On this, Hue Osram Smart+ sockets* were registered but not forwarded by Hue to HomeKit. So, the story began, now I have countless Osram plugs in the Homebridge system and thus in HomeKit.
Pingback: Install Node-Red in parallel with Homebridge - Mojo - Blog
Pingback: Connect Homebridge to Hue and expand your smart home