Home-Assistant is an open-source smart home software that allows us to easily integrate many different devices. All we need to do is set up Home Assistant on a Raspberry Pi and connect our household appliances to it. With the right configuration, we can analyse, control, and schedule everything at home with our smartphone. The first step of the smart home is the installation of the Raspberry Pi Home Assistant software.
Home-Assistant Hardware Components
Here are the essential hardware components you need to install Home Assistant on a Raspberry Pi:
- Raspberry Pi: You need a Raspberry Pi (ideally model 4 for testing, model 3), which serves as your smart home server.
- Micro SD Card: A 32 GB Micro SD card is sufficient. The Home Assistant image is stored on this card.
- SD Card Reader: You need an SD card reader to write the Home Assistant image to the Micro SD card.
- Computer or Laptop: You need a computer or laptop to flash the Home Assistant image onto the SD card.
- Power Supply: A power supply for the Raspberry Pi to power it.
- Ethernet Cable or WLAN Adapter: To connect the Raspberry Pi to the internet.
These are the basic hardware components you need to install Home Assistant on a Raspberry Pi and start your smart home! 🏡🔌🌟
Install Home-Assistant with the Pi Imager
Now I will explain the installation process with the Raspberry Pi Imager:
- Download Raspberry Pi Imager: Download the Raspberry Pi Imager on your computer. You can find it on the official Raspberry Pi website.
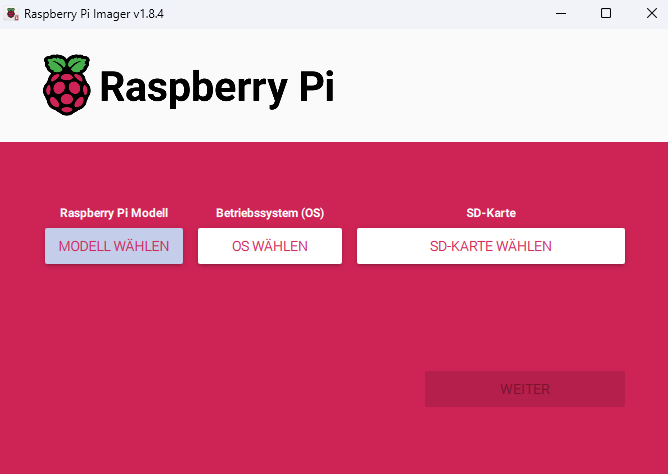
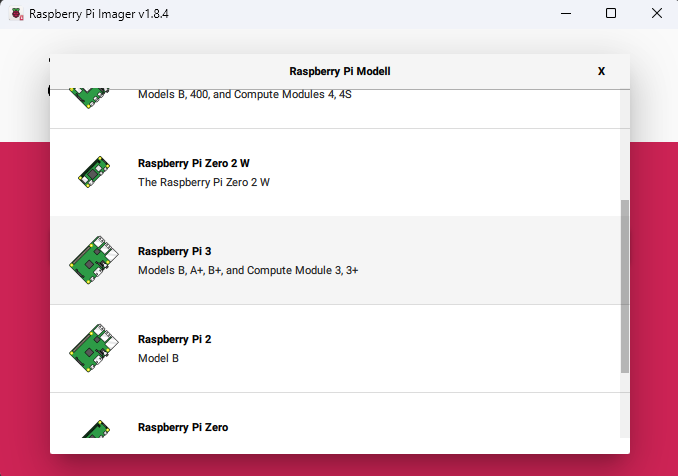
Choose Model - Open Raspberry Pi Imager: Start the Raspberry Pi Imager and select your Raspberry Pi device.
Choose your Raspberry Pi Model - Select Operating System: Click on “Choose OS” and then on “Other specific-purpose OS > Home assistants and home automation > Home Assistant”.
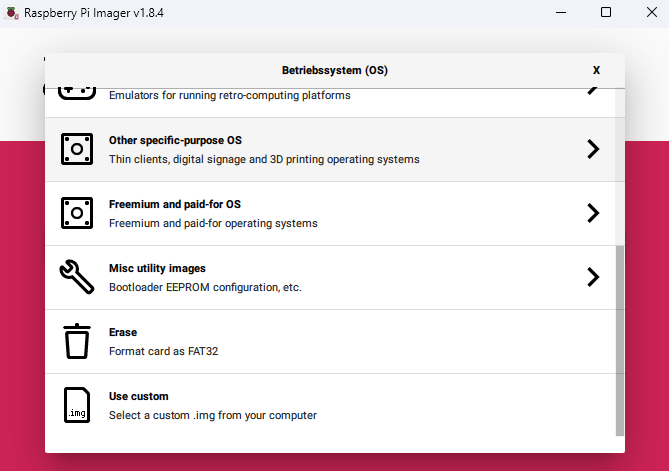
Other specific-purpose Os for Home Assistant 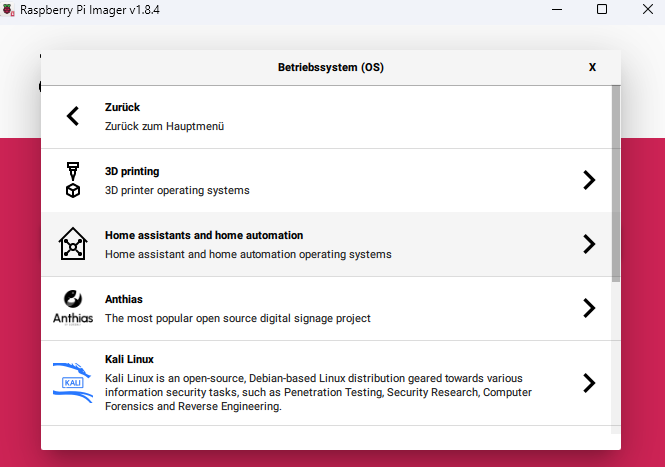
Home assistant and aome automation 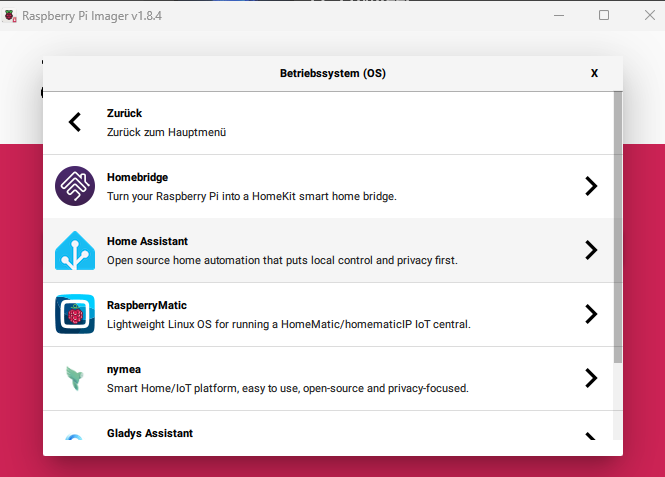
Raspberry Pi Imager for Home Assistant - Select Storage Medium: Insert the SD card into your computer. Caution: The contents of the card will be overwritten. Select your SD card.
- Write Image to SD Card: Start the process with “Next”. Wait until the Home Assistant OS has been written to the SD card.
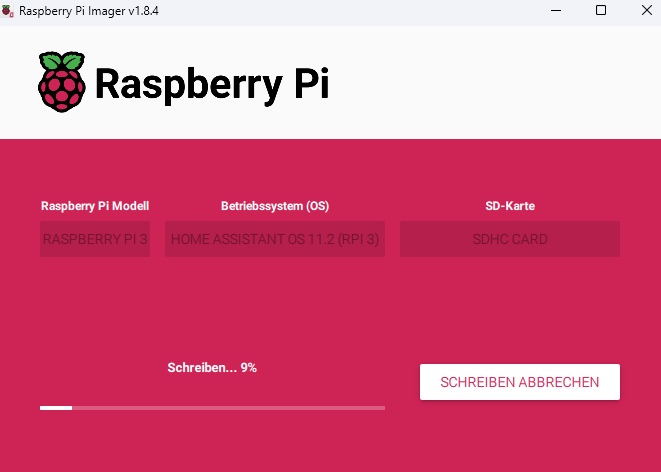
Raspberry Pi Imager for Home Assistant - Start Raspberry Pi: Insert the SD card into your Raspberry Pi. Connect the Raspberry Pi to the same network as your computer via an Ethernet cable. Connect the power supply to start the device.
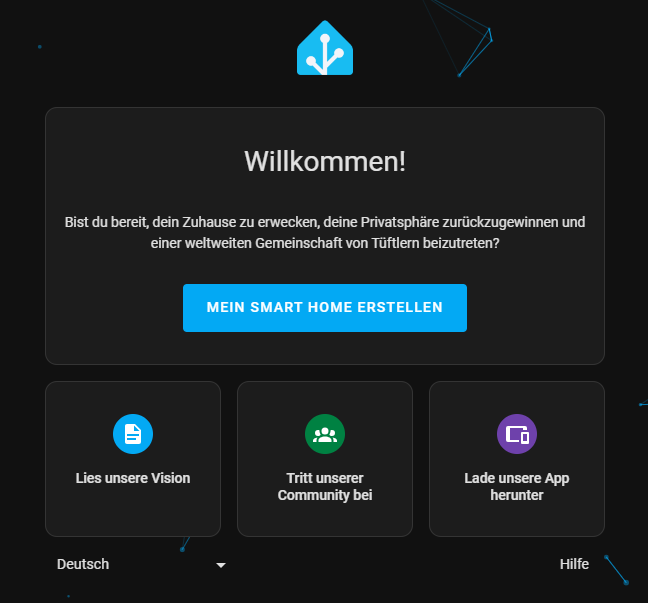
- Access Home Assistant: After a few minutes, you can access Home Assistant via your web browser. Enter
homeassistant.local:8123. If you are using an older version of Windows or have a stricter network configuration, usehomeassistant:8123or[your_Raspberry_Pi_IP:8123](replace[your_Raspberry_Pi_IP]with the IP address of your Raspberry Pi).
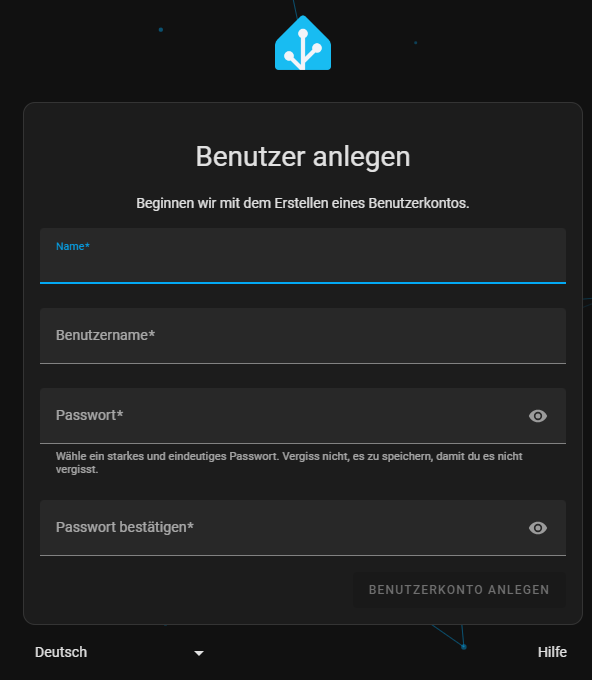
Create the Owner User Account
When you start Home Assistant for the first time, an owner user account is automatically created. This account has special privileges and can do the following, for example:
- Create and manage other user accounts: As the owner, you can add more users and set their permissions.
- Configure integrations and other settings: You can set up Home Assistant according to your preferences.
To secure your smart home, you should choose a secure password. Because you may access Home Assistant from outside. Treat the password like the key to your house. When you’re ready, click on the “Create My Smart Home” button.
Set hometown in Home-Assistant
The hometown is an important setting in Home Assistant because it is used for various functions and automations:
- Sun position and time of day: Home Assistant uses the hometown to calculate the sun position. This is important for automations that are based on daylight, e.g., turning on lights at sunset.
- Weather data: When you integrate weather information into Home Assistant, it is tailored to your hometown. You get accurate weather forecasts and conditions for your region.
- Geographical zones: You can set up geographical zones for presence detection and other automations. The hometown is the main zone where your home is located.
- Travel time calculations: If you use traffic information or travel time calculations, Home Assistant needs your hometown to provide accurate estimates.
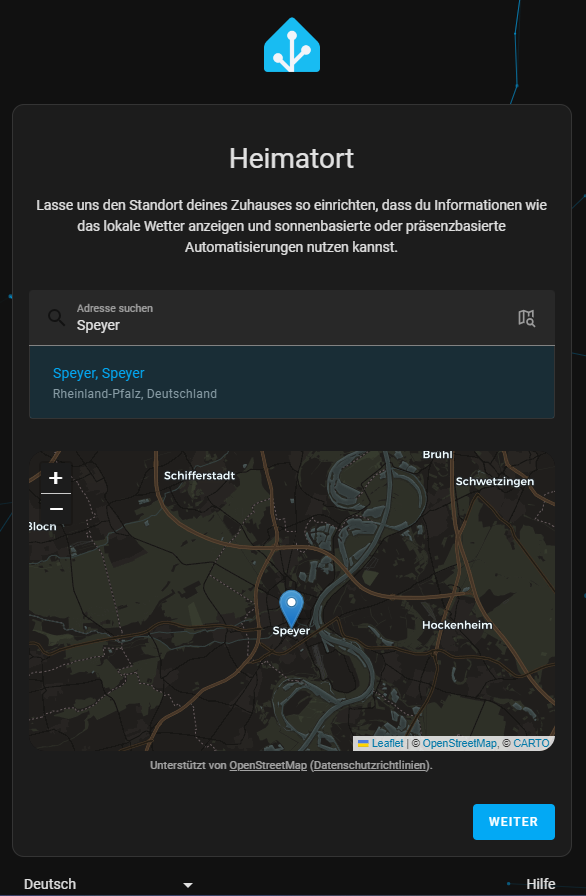
Make sure you set your hometown correctly so that Home Assistant works optimally!
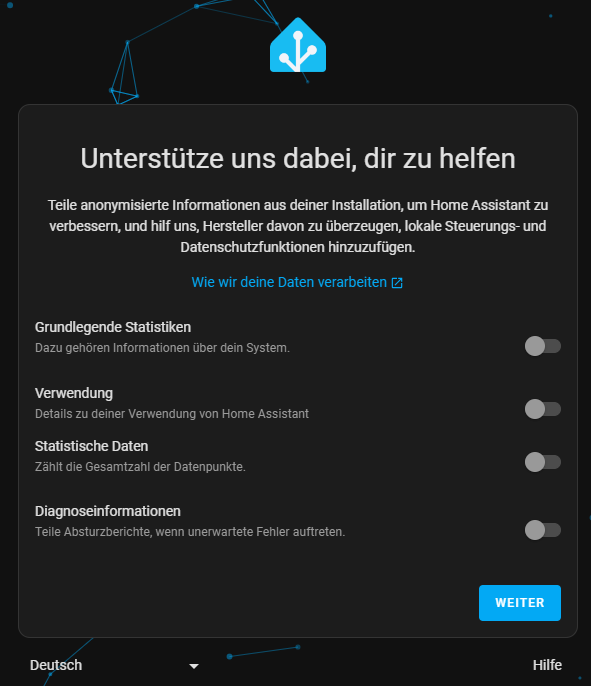
Transmission settings, user data
Personal usage data are sensitive information that can identify you as an individual. When setting up Home Assistant, you may be asked what data you want to transmit. Remember that you have control over your data. You can decide for yourself what information you want to share, and therefore adjust the privacy settings accordingly.
Home-Assistant recognizes compatible devices
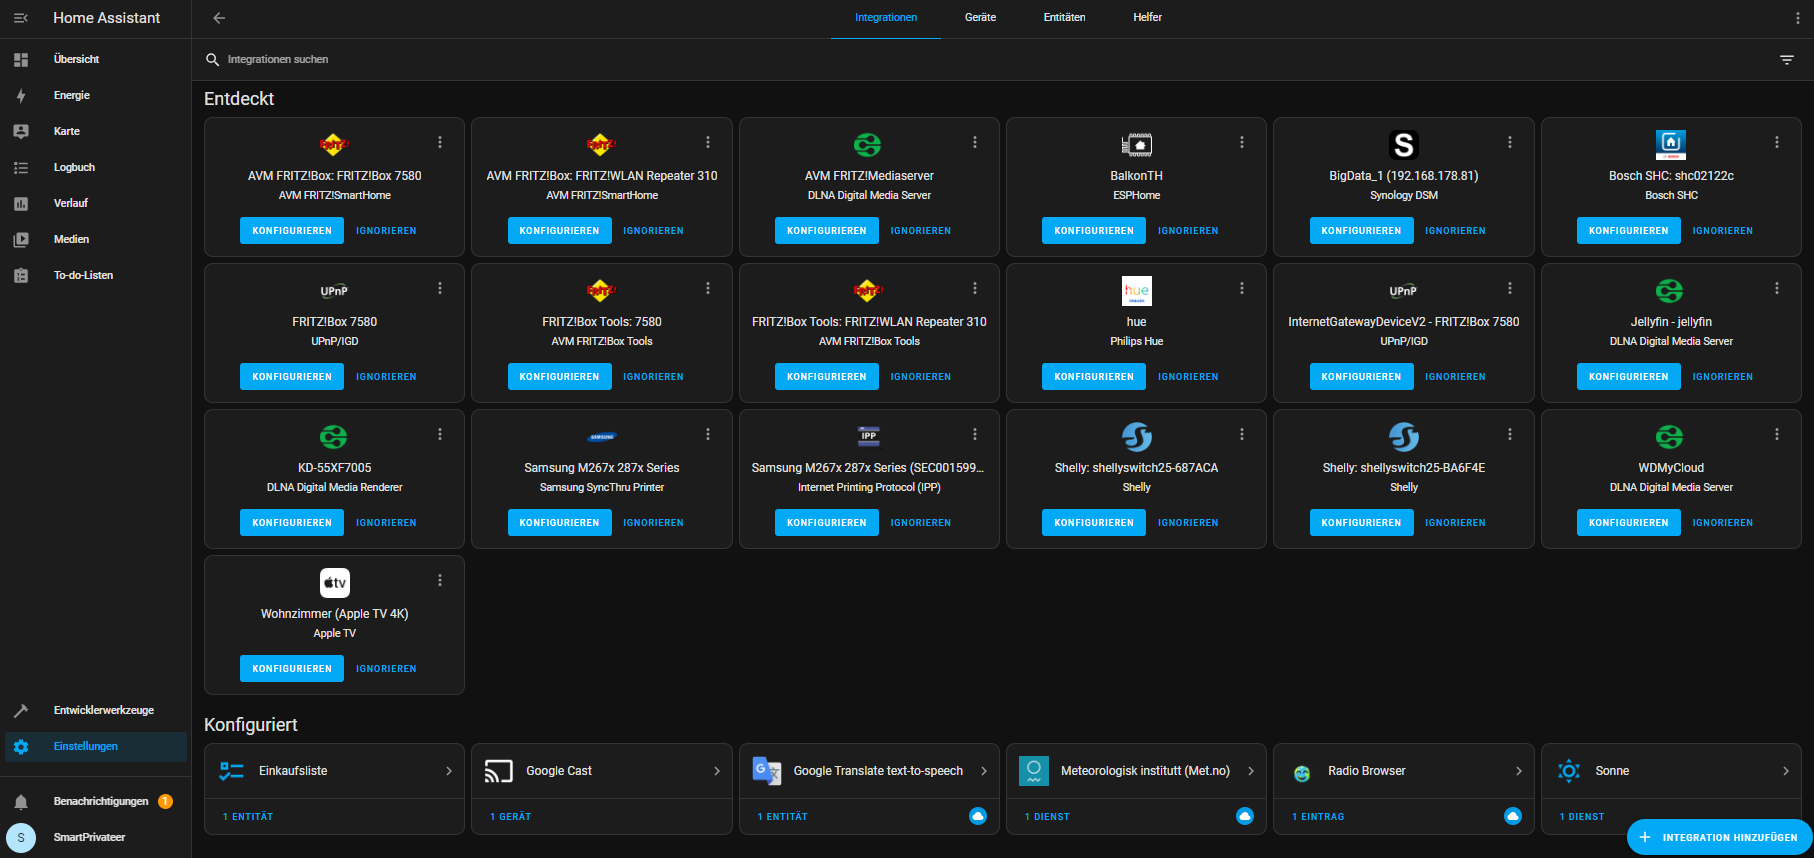
Home Assistant automatically scans your network for compatible devices at startup. This device detection process helps you find your smart home devices and integrate them into Home Assistant.
Automatic configuration: Home Assistant can automatically detect and configure zeroconf/mDNS and UPnP devices on your network. This means that it searches for certain devices and automatically makes the necessary settings.
Manual configuration: In some cases, you may still need to manually add the configuration for certain devices. This is done via the configuration file (configuration.yaml). You can find the specific instructions for each device on the Home Assistant component page.

Congratulations to the Home-Assistant!
You did it! Your Home Assistant is now ready to use, and the Overview Dashboard welcomes you. This is the place where you take control of your smart home and keep an eye on all your devices, sensors, and automations. My TV soundbar named “Mozart” is recognized and displayed directly without me having to set anything up.
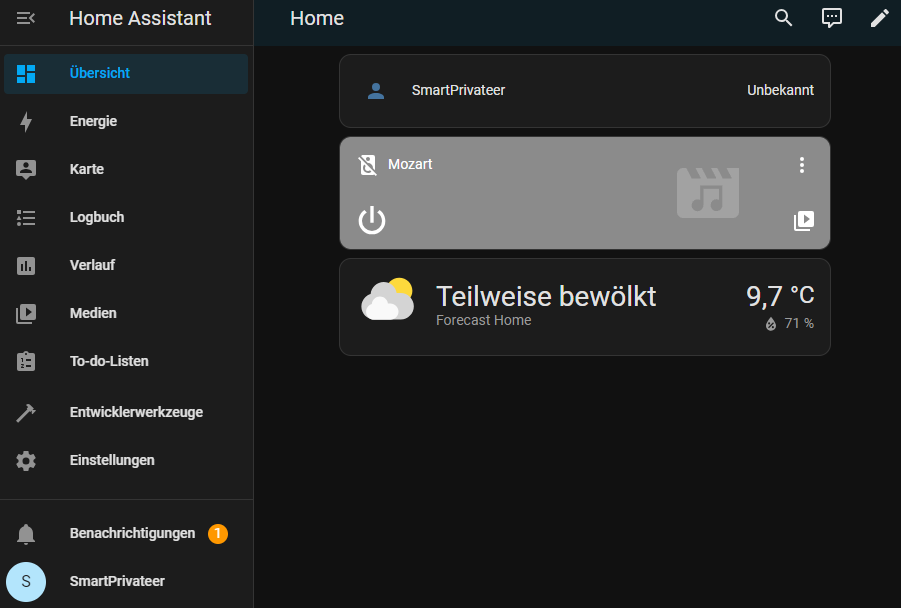
Let’s take a moment to celebrate this milestone:
- The power of the smart home: With Home Assistant, you can now control your lighting, adjust the room temperature, monitor surveillance cameras, play music, and much more – all from your smartphone!
- Automations and scenes: You can now create automations to make your home smarter. For example: Automatically turn on the light when you come home, or dim it when you’re watching a movie. And with scenes, you can change various settings with a single click.
- Integrations and extensions: Home Assistant offers a variety of integrations for different devices and platforms. Add your smart home devices to seamlessly integrate them into your system.
- Community and Support: The Home Assistant community is great! You can find forums, blogs, tutorials, and helpful people who are there to help you with questions and problems.
- Your creativity is needed: Now you can implement your own ideas. How about a notification when the washing machine is done? Or a light scenario for cosy evenings? Your imagination is the limit!
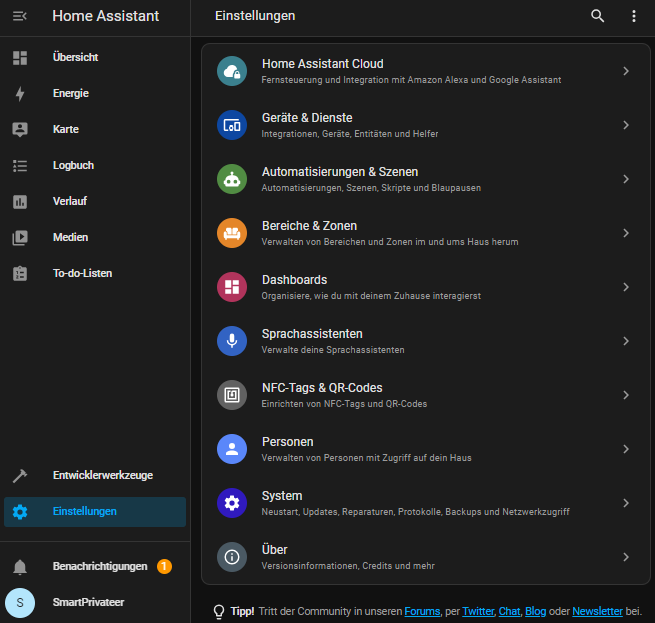
When you click on the “Settings” menu item, the settings page opens with the “Devices & Services” section. Among other things, the found integrations are displayed there.
Welcome to the world of Smart Homes! 🏡🌟
Pingback: Installing Home Assistant VM on Proxmox
Pingback: Connecting Home Assistant with Hue to Enhance Your Smart Home