If you have, like me, already a Raspberry Pi with a Homebridge running, it is a good idea to install Node-Red on the same Raspberry. Node-Red is a real help for more sophisticated automations. Then there is also the possibility, for example, to create physically non-existent switches in HomeKit directly to control devices via Node-Red, which otherwise would have no access to HomeKit at all. Interest aroused? Then read on and take the first step into another level of the Internet of Things, a long way from simply switching on a light!
What is Node-Red?
Node-Red is a graphical development software in the field of Internet of Things (IoT). Flows can be developed with function blocks. In these flow information, for example from Homebridge, is processed, and you can react to it or filter, change or output this information. I use the nodes to control the radio and the volume of my Volumios via HomeKit. But now comes first the installation.
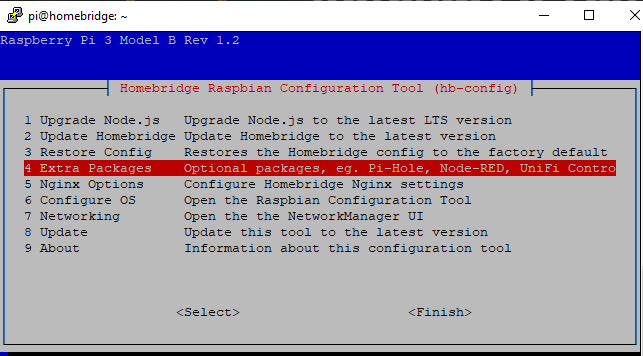
If you have installed a Homebridge according to the tutorial “Install Homebridge on the Raspberry Pi, it’s easy!” then you should know the tool “Putty”, if not then read it again. Because now we need an SSH connection to the Raspberry Pi* with the Homebridge. To install Node-Red, we use the maintenance tool of Homebridge (hb-config). Once the tool is open, we select item four:
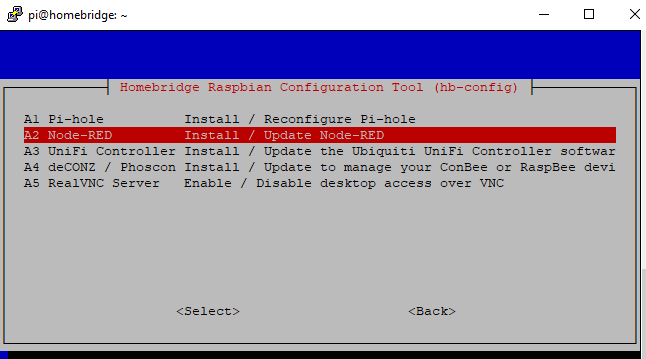
Then “A2” is selected to install Node-Red. By the way, it is the same procedure when an update is pending.
After a security prompt, the software is installed.
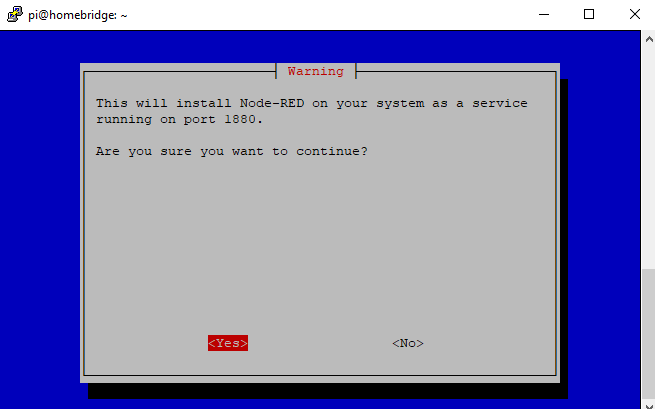
After confirming, the installation already starts. This will take a while. When the installation is finished, you can reach Node-Red with the IP of the Homebridge with attached port. For example, “http://192.168.1.51:1880” or “http://homebridge:1880”. In any case, you should see the following:
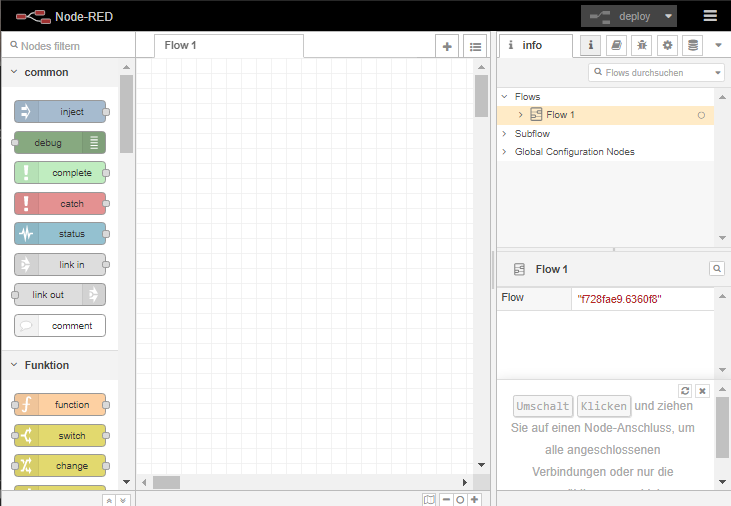
The nodes to query devices in the Homebridge, to react to events, or to switch devices are already included in the installation. Now a world of new possibilities is open to you to refine your automations or realize previously impossible processes.